
IdealAuto - Premium Automotive WordPress Theme
IdealAuto - Premium Automotive WordPress Theme
@ 2021 Copyright JWSThemes team.
Thank you for purchasing IdealAuto WordPress Theme. Before you get started, please be sure to always check out these documentation files. We outline all kinds of good information, and provide you with all the details you need know to use IdealAuto Theme.
If you are unable to find your answer here in the documentation, please contact us on our Support Center or directly from our themeforest account.
Thanks so much for purchasing our Theme. It's our pleasured of making your choice. We hope that you would enjoy it!
To download the IdealAuto theme, please log in your ThemeForest account and then go to ThemeForest download page. Locate to IdealAuto theme and then download the installable WordPress file only.
When you download the theme from Themeforest, you will get an archive file in .zip extension.
You need to unzip that archive. When done, you should see IdealAuto.zip (zip file name can be changed from version to version).
Please, follow the steps below to install IdealAuto Theme.
Step 1 - Login to your WordPress Dashboard.
Step 2 - Go to Appearance >
Themes. Click Add new button, located at the top of the screen or Add new theme ( see screenshots below ).
Step 3 - Click on Upload button at the top of the screen.
Step 4 - Choose
IdealAuto.zip.
Step 5 - Wait while the theme is uploaded and installed then activate the theme.
Step 6 - After activating the theme a notice should appear on the top of the screen, click on begin installing plugins ( see screenshots below ).
Step 7 - Select all the plugin,change Bulk Actions drop to Install then click apply ( see screenshots below ).
Step 8 - Congratulation you are ready to use IdealAuto, check the Initiate Steps part of our documentation to see what you may want to do before starting to edit
your WordPress Site.


“Are you sure you want to do this?”
If you get the “Are you sure you want to do this” message when installing IdealAuto.zip file via WordPress, it means you have an upload file size limit. Install the theme via
FTP if this happens, or ask your hosting company to increase the limit.
Missing stylesheet file
If you get an error saying that the stylesheet is missing, then you have uploaded the wrong folder. Please check that you are uploading the IdealAuto.zip within the Theme Files folder. You
have to unzip the file that you download from Themeforest to find this.
If you are going to install the theme using FTP, you will need an FTP Client, such as FileZilla.
When you download the theme from Themeforest, you will get an archive file in .zip extension.
You need to unzip that archive. When done, you should see IdealAuto Folder
(folder name can be changed from version to version).
Please, follow the steps below to install the theme via FTP:
Step 1 - Log into your hosting space (server) via FTP client.
Step 2 - In extracted archive folder, find
IdealAuto folder
Step 3 - Upload the IdealAuto
folder to your server in path ../wp-content/themes/.
Step 4 - The uploaded path should be like this: ../wp-content/themes/IdealAuto/
Step 5 - Login to your WordPress Dashboard and go to Appearance > Themes and activate the IdealAuto theme.
Step 6 - After activating the theme a notice should appear on the top of the screen, click on begin installing plugins ( see screenshots below ).
Step 7 - Select all the plugin,change Bulk Actions drop to Install then click apply ( see screenshots below ).
Step 8 - Congratulation you are ready to use IdealAuto, check the First Steps part of our documentation to see what you may want to do before starting to edit
your WordPress Site.
Before importing the dummy data Make sure you have all the plugin installed (if you want to use portfolio, team, testimonial, packages and woocommerce. You make sure to install all first ).
If you have problems importing the demo ( example : infinite loading, error 505 with when using wordpress importer ) then you may have a problem with the server settings. Please create ticket in Our Support
Center.
Step 1 - Log into your WordPress Dashboard.
Step 2 - Install and Activate All Plugin.
Step 1 - Log into your WordPress Dashboard.
Step 2 - Go to Unyson. Continue to click on Download Backup & Demo Content button. (if you cannot find Download Backup & Demo Content, please
click to button Show more extensions you will find it)
Step 3 - Then go to Tools >
Demo Content Install > Install
Step 4 - The Dummy content is really big and may takes more then 30 minutes to import depending where you are living, Do not interrupt/cancel the import process!
Step 6 - Done!
This video tutorial shows you how to Import Data IdealAuto Theme with just one click.
If you would like to learn the best practice of using IdealAuto theme, you can import content from our demo web site. Importing theme is performed using XML file located in theme ZIP file downloaded from Themeforest and following these steps.
Elementor is the most popular drag and drop editor for Wordpress.

If you need dedicated support for this component, please visit: Elementor.
Here is Documentation of Elementor guide.
IdealAuto theme includes the premium plugin - Revolution Slider.
Once you've installed and activated the Revolution Slider plugin, you will then see the menu item appear at the bottom of the WordPress menu, as below:

You can import the revolution slider we used in our demo, all slider are in the slider folder. To learn more about the Revolution Slider plugin please read the Plugin documentation
Contact Form 7 can manage multiple contact forms, plus you can customize the form and the mail contents flexibly with simple markup. The form supports Ajax-powered submitting, CAPTCHA, Akismet spam filtering and so on.
To learn more about the Contact Form plugin please read the Plugin documentation
Easy Forms for Mailchimp allows you to add unlimited Mailchimp sign up forms to your WordPress site. You can add forms to posts, pages, sidebars and other widgetized areas. Your Mailchimp API Key connects your site to your account and pulls in all of your list information. List statistics can be viewed right from your dashboard.
To learn more about the Easy Forms for Mailchimp plugin please read the Plugin documentation
Easy Forms for Mailchimp allows you to add unlimited Mailchimp sign up forms to your WordPress site. You can add forms to posts, pages, sidebars and other widgetized areas. Your Mailchimp API Key connects your site to your account and pulls in all of your list information. List statistics can be viewed right from your dashboard.
To learn more about the ProfilePress plugin please read the Plugin documentation
For full documentation visit the following websites:
WooCommerce Plugin
Page
WooCommerce
Documentation
WooCommerce
Community Forums
WooCommerce Builtin
Shortcodes
WooCommerce 101
video series
Step 1 - Login to your WordPress Dashboard.
Step 2 - Go to JWS Settings -> Theme Options
> General.
Step 3 - Choose which part of the theme you want to modify.
1. General - To upload logo, favicon, change link send mail, link login form redirect, turn on/off the Less Option,...
2. Header - Choose the header layout that you want to show on website
3. Footer - Choose the footer layout that you want to show on website
4. Color Styling - Select the primary color, button color, hover color for items in your website.
5. Title Bar - show title bar on website include images and breadcrumb .
6. Blog - Setting some attributes in your blog detail.
7.Shop - Setting some attributes in your shop.
8.Typography - Specify the body font properties.
Step 4 - When you finish customizing the general options don't forget to save.

Step 1 - Go to Settings >
Reading in your WordPress Dashboard panel.
Step 2 - Set "Front page
displays" to a "Static Page".
Step 3 - In the drop down menu for
"Front Page" choose a page which will be your home page.
Step 4 - Leave the drop down menu for "Posts page" empty, as this is not used by the theme.
Step 5 - Save changes.

Headers built by Elementor, so you can easy to edit the header
Step 1 - Login to your WordPress Dashboard.
Step 2 - Go to JWS Settings -> Header Footers Template and choosing the header that you want to add this menu after that click Edit With Elementor.


Besides, if you want to show your header/footer to a special page (Ex: only show header 2 to page contact), please follow these steps:
Step 1 - Go to the page that you want to show your header.


Step 1 - Login to the WordPress
Dashboard.
Step 2 - From the
'Appearance' menu on the left-hand side of the Dashboard, select the 'Menus' option to bring up the Menu Editor.

The Screen Options allow you to choose which items you can use to add to a menu. Certain items, like Posts are hidden by default. The Screen Options are located in the top right corner of your WordPress Dashboard.
Step 1 - Locate the pane entitled
Pages.
Step 2 - Within this pane, select the
View All link to bring up a list of all the currently published Pages on your site.

Once you've created a menu and filled it with items, it's time to assign it to one of the theme pre-defined locations.
Step 1 - Go to JWS Settings -> Header Footers Template and choosing the header that you want to add this menu after that click Edit With Elementor.


Add a mega menu create by Elemetor is very easy with Elementor.
Step 1 - Create a Mega menu shortcode by Elementor: JWS Setting -> Header , Footers And Template -> Add New .
Step 2 - Copy the mega menu shortcode


Please follow these steps to upload your Logo
Step 1 - Go to JWS Settings -> Header Footers Template and choosing the header that you want to show on your website after that click Edit With Elementor.

![]()
To upload the favicon, please go to JWS Settings -> Theme Options > General

Also, you can upload your favicon image in the Appearance. Please, follow the steps below to upload your favicon:
- Go to Appearance > Customize > Site Identity.

After user register account and verify email will be send to client when click to the "Verify your account" button your website will redirect to the page that we are setup at here:


To add the verify link, please go to JWS Settings -> Theme Options > General -> Link verify email -> and add the link verify at here


For each page you can change the title style, title background color, header layout, footer layout, etc. Check the screenshot and read the documentation to see how it works

Please follow the steps below to set up Listing Blog Page:
Step 1 - Login to your WordPress Dashboard.
Step 2 Go to JWS Setting -> Theme Options -> Blogs.
Step 3 -You can choose the type layout or switch options of Blogs page by the way change bellow setting

Please follow the steps below to set up Single Blog:
Step 1 - Login to your WordPress Dashboard.
Step 2 Go to JWS Setting -> Theme Options -> Blogs -> Blog Single.
Step 3 - Edit your single blog at here

Please follow the steps below to set up Shop page:
Step 1 - Login to your WordPress Dashboard.
Step 2 - Go to JWS Setting -> Theme Options.
Step 3 - You can choose the type layout or switch options of shop by the way change bellow setting.


This is some options in shop that you need to know:
Enble Rental Mode: Turn on this option when you use shop for rent car
Select product and remove in shop page: You can select products that you don't want to show on Shop page
Select taxonomy field for product filter: Choose which fields should be presented on the filter by the way drag and drop mouse field from "Disabled" to "Enabled" tab


Product Per Page: you can create a dropdown show total number product to show per a shop page like this:

Columns Review: Option to show product per a row like this:

Please follow the steps below to set up Single Product page:
Step 1 - Login to your WordPress Dashboard.
Step 2 - Go to JWS Setting -> Theme Options -> Shop -> Shop Single.
Step 3 - You can choose the type layout or switch options of single product by the way change bellow setting.

Please follow the steps below to create new a Inventory:
Step 1 - Login to your WordPress Dashboard.
Step 2 - Go to Inventory -> Add New.

1.Vehicle Data: show your data
1.1. General: show Condition, Car status, Set Featured
1.2. Attributes

 1.3. Image
1.4. Regular price
1.5. Window Sticker
 1.6. Video
1.7. Vehicle Review Stamps
 1.8 . Vehicle Dealer Notes
2.Vehicle Tabs: show bellow fields:


If you cannot know where we create data for Model, year, make,.... please check at Taxonomy of Inventory at here


Please follow the steps below to set up Single Product page:
Step 1 - Login to your WordPress Dashboard.
Step 2 - Go to JWS Setting -> Theme Options -> Inventory.
Step 3 - You can choose the type layout or switch options of Inventory Page by the way change bellow setting.

This is some options in Inventory page that you need to know:
Sold Vehicles:This will hide the vehicles that are sold
Vehicles Per Page: you can create a dropdown show total number Inventory to show per a shop page like this:

Select taxonomy field for inventory filter: Choose which fields should be presented on the filter by the way drag and drop mouse field from "Disabled" to "Enabled" tab

Please follow the steps below to set up Single Inventory page:
Step 1 - Login to your WordPress Dashboard.
Step 2 - Go to JWS Setting -> Theme Options -> Inventory -> Car Detail Settings.
Step 3 - You can choose the type layout or switch options of single product by the way change bellow setting.

Please follow the steps below to set up Currency for Inventory:
Step 1 - Login to your WordPress Dashboard.
Step 2 - Go to JWS Setting -> Theme Options -> Inventory -> Currency Settings.
Step 3 - You can change the currency by the way change bellow setting.

Please follow the steps below to set up Currency for Inventory:
Step 1 - Login to your WordPress Dashboard.
Step 2 - Go to JWS Setting -> Theme Options -> Inventory -> Cars Compare Settings.
Step 3 - You can change the page by the way change bellow setting.

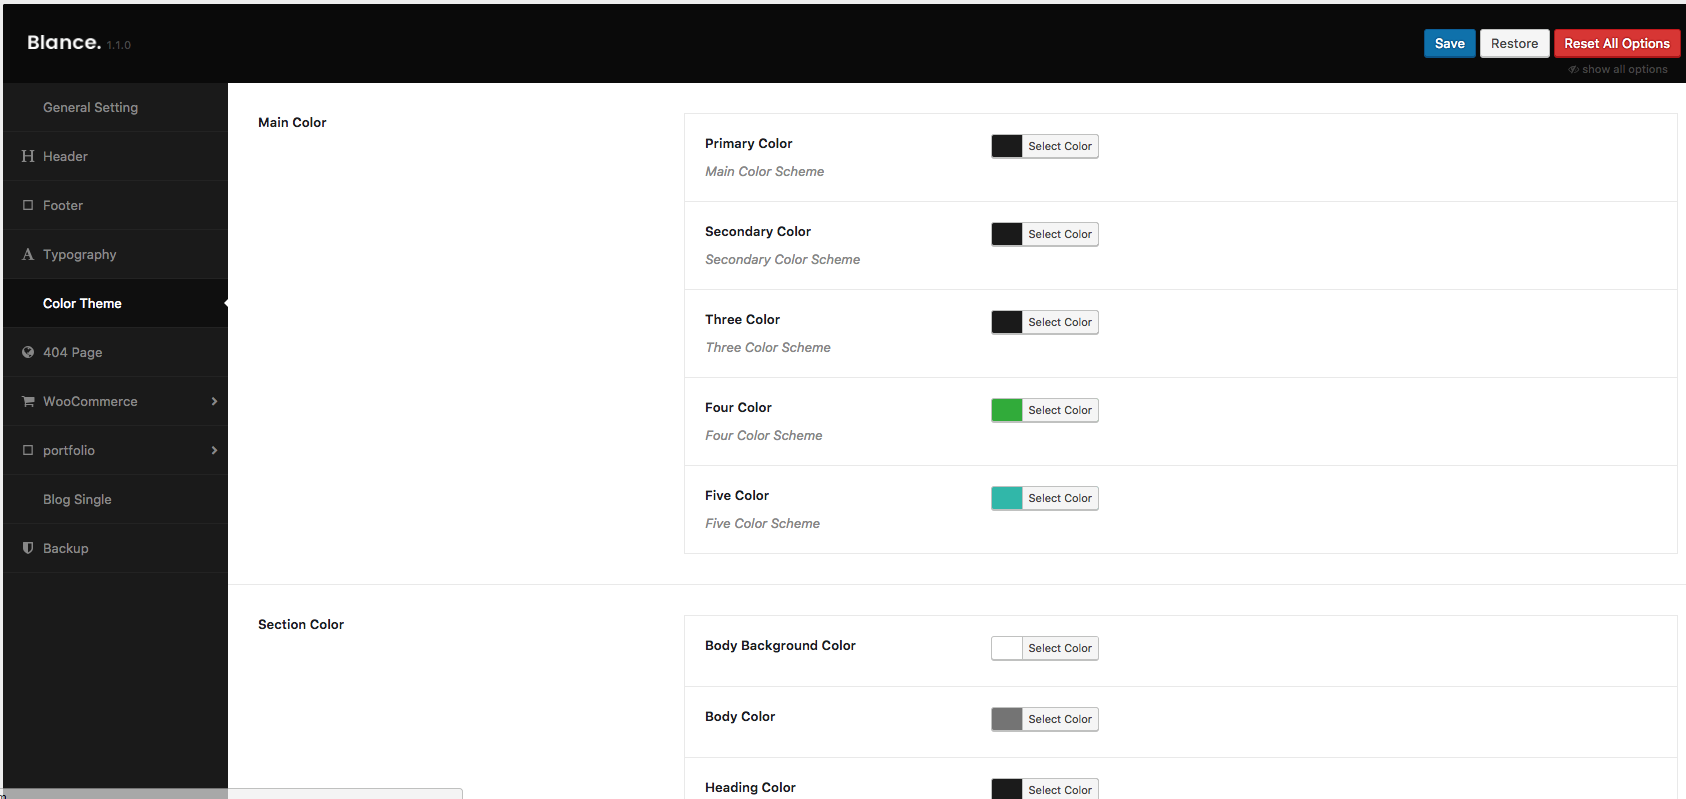
Step 1 - Login to your WordPress Dashboard.
Step 2 - Go to JWS Settings -> Theme Options
> Colors Styling
You can change the main color and hover color at here.


Step 1 - Log in to your WordPress
Administration Panel (Dashboard).
Step 2 - Click the 'Blog
Posts' tab.
Step 3 - Click the 'Add
New' sub-tab.
Step 4 - Start filling in the blanks: enter your post title in the upper field, and enter your post body content in the main post editing box below it.
Step 5 - As needed, select a category, add tags, post format, fill in the meta setings below the editor.
Step 6 - Upload a featured image for your Post.

To you show your posts you need to create a Blog page.


IdealAuto theme includes support for the Elementor plugin. Elementor comes with a lot of block to help you quickly and easily building your pages.
You can read more information with the documentation live at link https://elementor.com/ to understand how it works.Step 1: Go to Pages > click "Add new" and then enter your page information.

Step 2: Click Edit With Elementor Button to edit content.
We created a lot of elemtent in Elementor, you can flexible to build your page
Click on "Publish" to save and publish your new page or "Save draft" to save it as a draft.
Here is how it works on our page

Step 1 - Install POEdit https://poedit.net/
Step 2 - Open file ***.pot by POEdit and traslate it : http://prntscr.com/bmhtpt
Step 3 - Click Save to save changes.

We created many elementor widgets with many layout, you just need search with keywork is "jws", all of widget create from us will be show for you

Having many ways to create the title bar on your website
Step 1 - Go to JWS Setting -> Theme Options -> Title Bar".
Step 2 - Choose Title Bar Type".
Step 3 - Choose Title Background".
In the JWS Setting -> Theme Options you can Switch on/off title bar, choose type of titlebar, Add suttile for titlebar, Swicth breadcrumbs, Change padding of titlebar

In the Page Option you can Switch on/off title bar, change layout

Please go to Woocommerce > Settings > General > Currency Options


This is the instruction of configureurating currency tab in WooCommerce Settings.
IdealAuto comes with a Child Theme.
Simply install IdealAuto-child.zip like a regular WordPress theme.
A child theme is a theme that inherits the functionality of another theme, called the parent theme. Child themes allow you to modify, or add to the functionality of that parent theme. A child theme is the best, safest, and easiest way to modify an existing theme, whether you want to make a few tiny changes or extensive changes. Instead of modifying the theme files directly, you can create a child theme and override within.
There are a few reasons why you would want to use a child theme:
Child
Themes - Codex
You can watch this video to know the way create a Child Theme.
You need to use a Child Theme only if you are making code customizations.
Updating the theme via WordPress is very similar to the install process via WordPress.
Follow the steps below to update your theme via WordPress:
Step 1 - Log into your WordPress Dashboard.
Step 2 - Go to Appearance >
Themes.
Step 3 - Deactivate the IdealAuto theme by simply activating a different theme. Once you activate a different theme, you can delete the IdealAuto theme.
Step 4 - Delete the IdealAuto theme. Do not worry, your content will not be lost!
Step 5 - Then simply upload the new
“IdealAuto.zip” file in the Appearance > Themes section. Click on the Install Themes tab at the top and choose to upload the zip file. You have this step explained in section:
Theme Installation via WordPress.
Updating the theme via FTP is very similar to the install process via FTP.
Follow the steps below to update your theme via FTP:
Step 1 - Go to ../wp-content >
themes location on your server using a FTP client and backup your "IdealAuto" theme folder by saving it to your computer, or you can choose to simply delete it. Your content will not be lost.
Step 2 - Download the new version of IdealAuto theme from your Themeforest and retrieve IdealAuto folder by unpacking the zip that you download from Themeforest
and IdealAuto_(version.number).zip.
Step 3 - Then simply drag and drop the new "IdealAuto" theme folder into ../wp-content > themes location. Choose to “Replace” the current one if you did not
delete it.
Step 4 - Log into your WordPress Dashboard, go to Appearance > Themes and activate the new IdealAuto theme.
Please contact to your hosting to increase the max_execution_time or follow this link it will help you solve your issues: https://www.wpbeginner.com/wp-tutorials/how-to-fix-fatal-error-maximum-execution-time-exceeded-in-wordpress/.
There are several things you can do to speed up your website. First thing you need to turn off the Less Option in JWS Setting -> Theme Options after you changed any thing on JWS Setting -> Theme Options and after you import the demo data. Consider adding a caching plugin to WordPress. We use and recommend W3 Total Cache. Another thing you can do is use a Content Delivery Network provider. We use and recommend MaxCDN (See our infographic about What is a CDN and Why you need it). You should also consider using a better web hosting provider. Shared hosts are usually slower. If you are receiving a lot of traffic, then you should consider moving to a VPS or a Dedicated server. Last but not least, check out our presentation about Maximizing Performance and Speeding up WordPress.
Please contact to your hosting to increase the max_execution_time or follow this link it will help you solve your issues: https://www.wpbeginner.com/wp-tutorials/how-to-fix-fatal-error-maximum-execution-time-exceeded-in-wordpress/.
Please follow the below steps to import the demo data on your website:
If your demo data cannot import, please take a screenshot of your issue and send us the login account to Admin Dashboard and FTP account to Our Support Center, we will help you import the demo data.
Please follow the below steps to import the demo data on your website:
Please add bellow code in both files to fix this issue:
- wp-config.php file:
define( 'ALTERNATE_WP_CRON', true );
- .htaccess file:
RewriteRule (wp-cron|class-fw-extension-backups|class--fw-ext-backups-module-tasks)\.php - [E=noabort:1]
RewriteRule .* - [E=noabort:1]
If your demo data cannot import, please take a screenshot of your issue and send us the login account to Admin Dashboard and FTP account to Our Support Center, we will help you import the demo data.
Yes, all you need to do is point the domain name to the hosting account.
There is no limit to the number of plugins you can install. However, too many plugins or even a few poorly coded plugins can slow your site down immensely, so it is important to install plugins correctly.
This most likely happens when you paste a code from a website with wrong formats. Sometimes the formatting error is done on the website where the code is avIdealAutole however most of the time, this error happens because you pasted the code on the wrong location. Unfortunately, you will not be able to make the edits using your wp-admin section. You will have to use FTP to login to your web host and modify your theme’s file.
Consider following our Beginner’s Guide to Pasting Code from the Web into WordPress.
We have written an extensive article on How to Install and Setup Google Analytics in WordPress. It is important to mention that you will NOT be able to install Google Analytics in your WordPress.com blog. They provide a built-in feature called WordPress.com Stats.
Embedding videos can add quite a bit of value to your blog and your content. Whether you want to use your own videos or just any video from YouTube or another video hosting site, you need to know how to embed videos within your posts.
The process is very simple and you can just post the URL for the video within the post. Make sure to put it where you would like it to show up. For more information about embedding videos in WordPress, check out our post about The Easiest Way to Embed Videos in WordPress.
Installing a copy of WordPress on your PC is possible. You can do this fairly easily, but you will need the right tools. Another thing to keep in mind, when you install WordPress on your PC, nobody will be able to see your website until you publish it with your own hosting account.
You can find out how to install WordPress on your PC without post called, A Quick Guide to Installing WordPress with WAMP on your Windows Computer.
Please take a look at this Article
Recommended PHP configuration limits are as follows:
You can verify your PHP configuration limits by installing a simple plugin found here. If you still cannot resolve the 500 error, talk with your web hosting support.
If you are installing your theme from the WordPress theme installer, but get a message that says "Are you sure you want to do this?", most likely your web server is configured with low PHP settings that only allow a certain size ZIP file to be uploaded via WP admin.
Most hosting companies configure their servers to only have the maximum file upload size limit at 8-10 MB, some are less. The IdealAuto theme ZIP is currently about 34 MB in size which is due to the included plugins and all the demo content. So if you get this error, your web server is rejecting the upload due to the overall size of the IdealAuto.zip file. WordPress is unfortunately giving you a rather ambiguous message in response. This is not a theme issue or bug.
There two ways to solve this problem.
Recommended PHP configureuration limits are as follows:
memory_limit 128M
post_max_size 32M
upload_max_filesize 32M
max_execution_time 600

